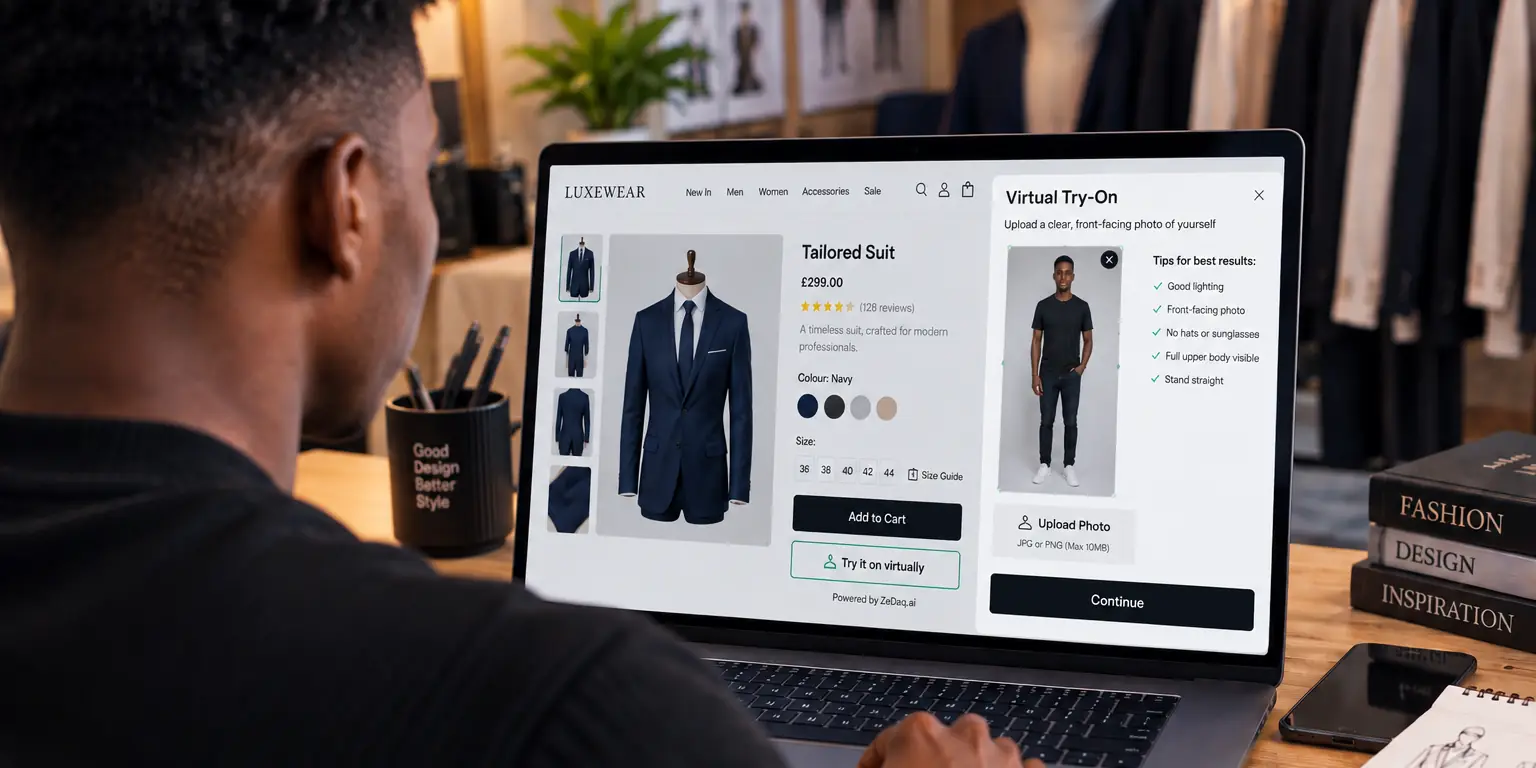
What Photo Works Best for Virtual Try-On?
By the ZeDaq.ai team · · 4 min read
On this page
- Why does the shopper's photo matter?
- What makes a good try-on photo?
- How do you take the photo step by step?
- What mistakes ruin a try-on photo?
- Does the photo also work for size recommendation?
- How can you check your photo before uploading?
- Is an eyewear try-on different?
- What should store owners tell shoppers?
The best photo for virtual try-on is a full-length, front-facing picture of you, standing straight in even light, in fitted clothes. Your whole body should be in the frame, with your arms slightly away from your sides and nothing blocking your torso.
This guide is for store owners who want to tell shoppers what to upload, and for shoppers using a virtual fitting room on a clothing website. With ZeDaq.ai, the shopper uploads one photo and sees the store's real garment on their body.
Why does the shopper's photo matter?
The result is built from the picture you give it. A clear photo shows your shape. A blurry, cropped or heavily filtered photo gives it less to work with.
You do not need a studio. A phone and a few minutes are enough. You can also test your own photo on the live demo before you ask shoppers to do the same.
What makes a good try-on photo?
Use this checklist:
- Full length. Your head, feet and everything between them are in the frame.
- Front facing. Stand square to the camera, not turned to the side.
- Straight posture. Stand tall with your weight even on both feet.
- Arms slightly away. Keep your arms a little out from your body, so they do not cover your waist or hips.
- Even light. Soft daylight from a window or a shaded outdoor spot works well.
- Simple background. A plain wall keeps attention on you.
- Fitted clothes. Close-fitting clothes show your real shape.
- Camera at chest height. A phone held too high or too low distorts proportions.
How do you take the photo step by step?
- Ask a friend to take the photo, or lean your phone against something steady.
- Place the phone at about chest height, in portrait orientation.
- Stand a few steps back until your whole body fits, with a small margin above your head and below your feet.
- Face the camera, relax your shoulders and let your arms hang slightly away from your sides.
- Check the photo. If any part of you is cut off, take it again.
A tripod or a stack of books works if no one can help. Avoid a mirror selfie, because the phone often hides part of your body.
What mistakes ruin a try-on photo?
These are the problems that most often make the result look wrong:
- Cropped bodies. If your feet or head are cut off, your full shape is not visible.
- Baggy or layered clothing. Bulky clothes hide your real outline.
- Crossed arms or hands on hips. They cover areas the garment should sit on.
- Strong shadows or backlight. A window behind you turns you into a silhouette.
- Heavy filters. They change your shape and your skin tone.
- Sitting, leaning or posing. A standing, front-facing body is the safest choice.
If the result looks off, retake the photo before you blame the garment.
Does the photo also work for size recommendation?
Yes, in the sense that the same kind of photo is used. ZeDaq.ai gives a size recommendation from a 30-second body scan, which is one photo plus the shopper's height. The measurements are matched to the store's own size chart.
For sizing, the photo is analyzed in the shopper's browser and only the measurements are sent. If the shopper also runs a try-on, that photo is sent to render the image.
Test your own photo
Try it on yourself
Live renderUpload a photo, pick a piece, see it rendered on you.
Pick something to try on
How can you check your photo before uploading?
Take ten seconds to review the picture on your phone.
- Zoom out and confirm your head and feet are both visible.
- Look at the edges for anything blocking your body, such as a bag or a chair.
- Check that your face and clothing are not in shadow.
- Make sure the image is not blurry.
If any check fails, retake the photo. A second attempt is quick, and it often makes the difference.
Is an eyewear try-on different?
Yes. Eyewear try-on uses the live camera, not an uploaded photo. If you sell glasses, see virtual try-on for sunglasses stores.
The garment side matters as well. The store's own product photo also affects the result, as explained in what product images virtual try-on needs.
What should store owners tell shoppers?
Put a short tip next to the upload button. For example: "Stand straight, full length, in fitted clothes, in good light."
Keep it brief, since shoppers rarely read long instructions. If you run an unusual platform, check your options first. The guide to virtual try-on on OpenCart shows how the widget and API work where there is no dedicated app.
See how a good photo looks in the demo
FAQs
Can I use a selfie?
A selfie usually cuts off your body, so it is not a good choice. Use a full-length photo instead.
Should I wear tight clothes?
Close-fitting clothes give the best view of your shape. Bulky layers hide it and can affect the result.
Does the background matter?
A plain background is a safe choice. Busy scenes add clutter and give you no benefit.
Does the shopper need an account?
No. The shopper uploads a photo on the store's product page, with no sign-up and no app to download.
Try ZeDaq.ai free
Virtual try-on and Find my size for your store, plus client, order and invoicing tools for tailors, in one subscription.

