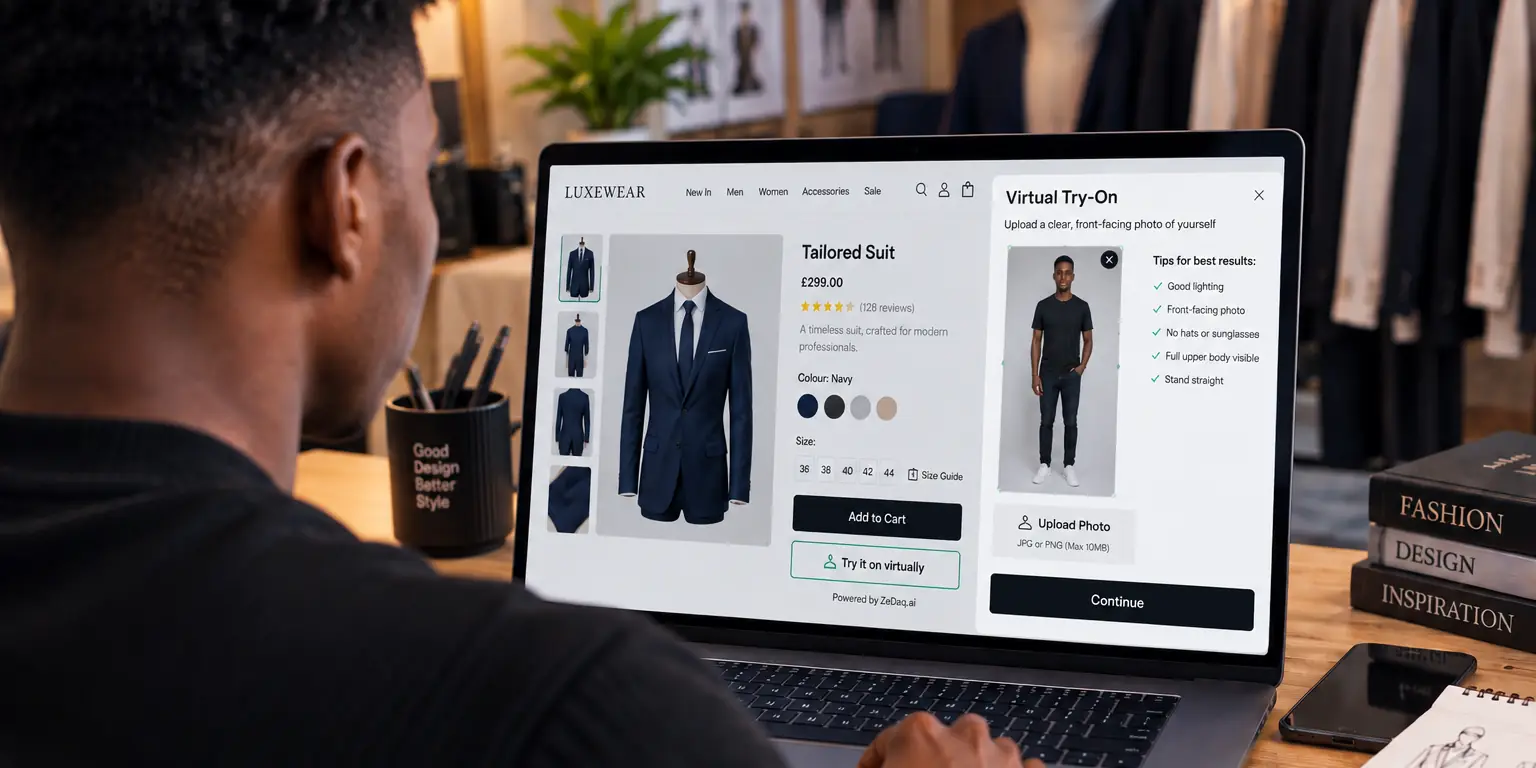
How to Introduce Virtual Try-On to Returning Customers
By the ZeDaq.ai team · · 4 min read
On this page
- Why do returning customers need a different message?
- What should the announcement say?
- How do you write the email?
- Where else should you announce it?
- How do you help them take a good photo?
- How do you handle questions from existing customers?
- When is the best time to announce it?
- What should you watch after launch?
To introduce virtual try-on to returning customers, tell them what it does in one sentence, show where to find it on a product page, and explain what photo to upload. A short email and a note on your site are enough, because these shoppers already trust you.
This guide is for store owners who have just switched on a virtual fitting room for clothing websites and want customers to notice it. It covers the message, the channels, the photo guidance and what to watch afterward.
Why do returning customers need a different message?
Returning customers know your sizes and your quality. They don't need convincing about the brand. They need to know what has changed and why it helps them.
So lead with the benefit: they can see your real garment on themselves before they buy. Skip long explanations of the technology.
New visitors, by contrast, need more reassurance about who you are. Keep the two messages separate.
What should the announcement say?
Keep it short and concrete. A good message answers four questions: what is it, how do I use it, what do I need, and what happens to my photo?
For ZeDaq.ai, you can say that the shopper uploads one photo and sees your real garment on their body. For sizing, the photo is analyzed in the shopper's browser and only measurements are sent. If they run a try-on, that photo is sent to render the image.
Try it on yourself before you announce it
Try it on yourself
Live renderUpload a photo, pick a piece, see it rendered on you.
Pick something to try on
How do you write the email?
Here is a template you can adapt:
Subject: See our pieces on you before you buy
Hi [first name],
You can now try our clothes on yourself on every product page. Tap "Try it on," upload one photo, and see the real garment on your body. You can also tap "Find my size" for a size suggestion from our own size chart.
It works on your phone, with no app to download and no account to create.
[Button: See it on [product name]]
Send it to people who have bought before, and link straight to a product they viewed or bought. Test it on yourself first, so you can answer questions.
Where else should you announce it?
Use places returning shoppers already look:
- A banner on the homepage for the first few weeks.
- A line in your order confirmation or shipping email.
- A note on size-chart pages, where doubt is highest.
- A pinned post or story on your social channels.
- A mention in customer service replies when someone asks about sizing.
Don't flood every channel. One clear message in three places beats ten loud ones.
How do you help them take a good photo?
Photo quality decides how good the result looks. Add a short guide next to the button, covering a plain background, even light and standing straight. Our guide on which photo works best for virtual try-on has details you can copy.
Different garments need different poses. For example, one-piece styles show the full body, as explained in the guide to virtual try-on for jumpsuits and rompers.
How do you handle questions from existing customers?
Returning shoppers will ask practical things. Prepare short answers before you send the email, and put them in a small FAQ near the button.
Common questions include whether the photo is stored, whether it works on a phone, and whether the suggested size replaces your size chart. Answer honestly and briefly. The size suggestion comes from your own chart, so tell shoppers to check the fit note as well.
Train your support team on the same answers. Consistent replies build trust faster than any banner.
When is the best time to announce it?
Pick a quiet moment when you can reply to questions quickly. Avoid sending it in the middle of a big sale, when your inbox is already full.
A good rhythm is a soft launch first. Tell a small group of loyal customers, fix any rough edges in your photo guide, then send the wider email.
What should you watch after launch?
Keep your expectations modest and measure simply. Ask yourself these questions after a few weeks:
- Are customers using the button, based on your app or store reports?
- What questions do they send to support?
- Which photos fail, and what advice would fix that?
Update your guide based on what you learn. Don't promise results, because they depend on your products and shoppers.
If your store isn't on Shopify, the setup is different. Our guide to virtual try-on for WooCommerce covers the script-tag widget route for other platforms.
See the shopper experience first
FAQs
Should you email your whole list or only past buyers?
Start with past buyers, because they know your sizes and are most likely to use it. You can widen the audience later.
Do you need to offer a discount to get people to try it?
No. A clear benefit and an easy button are enough. A discount can make it feel like a promotion instead of a useful tool.
How often should you mention it?
Mention it at launch, then at the moments where it helps: product pages, size-chart pages and sizing questions.
What if a customer is nervous about uploading a photo?
Explain in plain words what happens to the photo. For sizing, the photo is analyzed in the browser and only measurements are sent.
Try ZeDaq.ai free
Virtual try-on and Find my size for your store, plus client, order and invoicing tools for tailors, in one subscription.

