How to Add a Size Chart to Shopify Product Pages
By the ZeDaq.ai team · · 4 min read
On this page
To add a size chart to Shopify product pages, build the chart as a table, publish it as a store page or inside the product description, and link to it right next to the size picker. A size chart app can automate this, but the manual method needs nothing beyond your Shopify admin.
This guide covers both routes, then shows how a chart can go one step further and drive a size suggestion. If you are also planning to let shoppers see garments on themselves, the setup for adding virtual try-on to Shopify builds on the same chart.
What should a size chart include?
Start with the content, because layout is easy once the numbers are right.
- Body measurements, not garment measurements. Chest, waist and hips of the person who fits each size are what shoppers can compare against themselves.
- Your own size labels. If your small is a UK 8, say so.
- The unit. Offer centimeters and inches, or at least label the one you use.
- One chart per garment type. Tops, jackets, dresses and trousers fit differently.
- A fit note. "Relaxed fit, size down if between sizes" saves a support message.
If you need help gathering numbers, setting up your size chart for accurate recommendations covers which columns matter.
How do you add a size chart manually?
Shopify doesn't have a single built-in size chart field, so there are three common manual methods. Which one works depends on your theme.
Method 1: Put the table in a store page
- In your Shopify admin, go to Online Store → Pages and add a page called "Size guide".
- Paste or build your table in the page editor and save.
- Link to that page from each product description, or from your menu or footer.
This is the simplest option, but shoppers leave the product page to read it.
Method 2: Add the table to the product description
- Open the product in Products and edit the description.
- Insert a table or an image of the chart.
- Save and check the product page on your phone.
This keeps the chart on the page, but you have to repeat it for every product, and images of tables are hard to read on small screens. Prefer a real table to an image where your editor allows it.
Method 3: Use a theme or app feature
Some themes include a size guide block or popup. Many size chart apps from the Shopify App Store show a chart in a popup beside the size picker. Check your theme's documentation and the app's own listing for how it adds the button.
Where should the size chart link go?
Put it where the shopper chooses a size. A "Size guide" link directly under or beside the size options gets seen at the moment of decision.
A popup keeps the shopper on the product page, which is usually better than a link to another page. Whatever you choose, test it on a phone, since most fashion browsing happens there.
Do you need a different chart for each product?
You need a different chart for each garment type, not each product. Tops can share one chart, and so can trousers. When a style fits differently, such as an oversized hoodie, give it its own chart or its own note.
The trap with the manual methods is drift: if you edit the master chart, old copies pasted into descriptions stay as they were. A single page or an app that stores one chart avoids this.
How can a size chart suggest a size instead of just listing one?
A table makes the shopper do the matching. A recommendation does it for them.
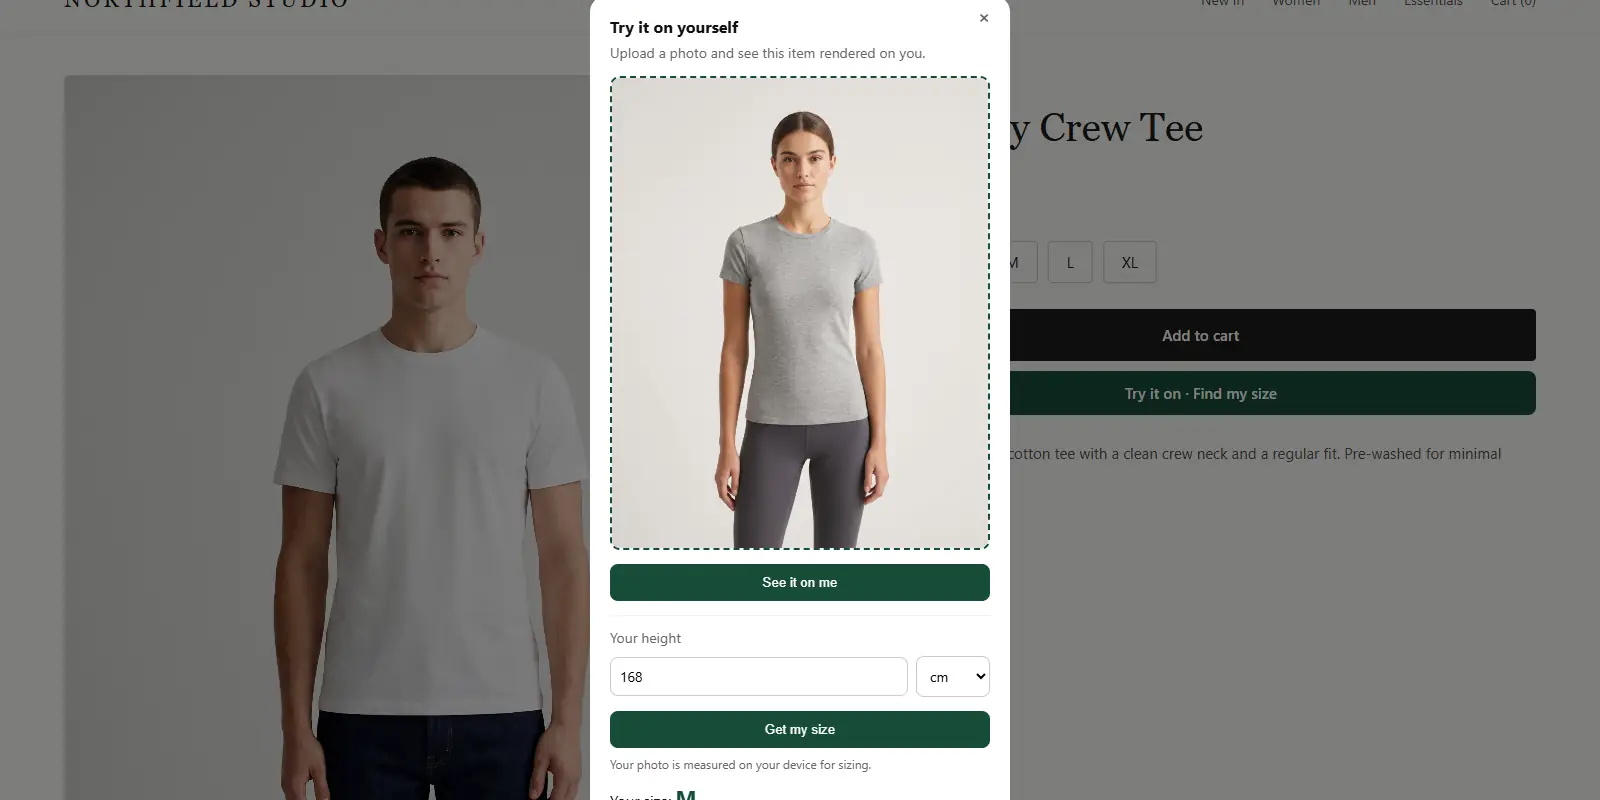
With ZeDaq.ai, you enter your size chart in the app, one per garment type, and the shopper's scan is matched against it. The shopper uploads one photo and types their height, and the app suggests a size from your own labels. If you haven't added a chart, it falls back to a generic UK/US/EU/AU chart.
The full flow is in the guide to showing size recommendations on Shopify product pages, and matching your size chart in a Shopify try-on app explains how to translate a table into the app's format.
Which size chart apps are worth comparing?
If you want a popup chart without editing every product, an app can help. Compare how each one stores the chart, whether it supports several garment types and how it displays on mobile. Our size chart apps for Shopify compared article walks through those differences.
For a Shopify setup in ZeDaq.ai, install the ZeDaq.ai Shopify app, then enter your chart in the app. The Free plan includes 3 measurements a month, so you can test with your own chart first.
Turn your size chart into a size recommendation
FAQs
Can I add a size chart to Shopify for free?
Yes. A store page or a table in the product description costs nothing beyond your Shopify plan. Apps add convenience like popups.
Should I use an image or a table?
Use a real table where you can. Images of tables are harder to read on a phone and can't be searched.
Where do I put the size chart link?
Next to the size picker, so the shopper sees it when choosing a size.
Do I need to repeat the chart on every product?
Not if you use a page or an app. Repeating it by hand makes updates harder and charts can drift out of date.
Try ZeDaq.ai free
Virtual try-on and Find my size for your store, plus client, order and invoicing tools for tailors, in one subscription.