How to Add Virtual Try-On to Shopify (No Code, 10 Minutes)
By the ZeDaq.ai team · · 4 min read
On this page
- What do you need before you start?
- Step 1: Install ZeDaq.ai from the Shopify App Store
- Step 2: Switch on the app embed
- Step 3: Choose placement and catalogue type
- Step 4: Add your size chart (optional, recommended)
- Step 5: Test it on your own products
- Step 6: Track the results
- How much does virtual try-on on Shopify cost?
- What problems come up, and how do you fix them?
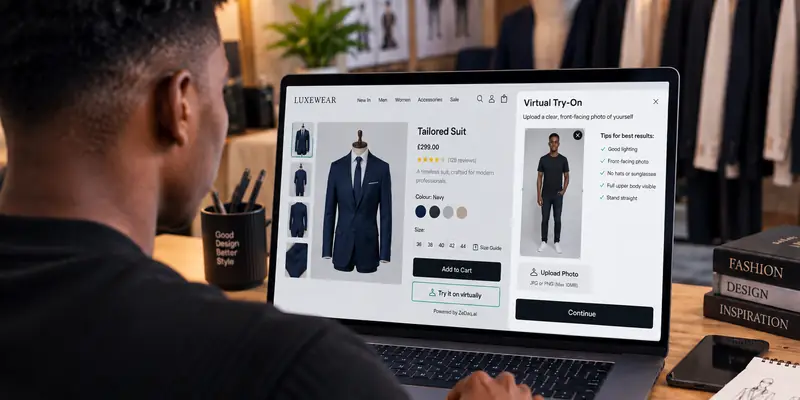
You can add AI virtual try-on to a Shopify store by installing a try-on app from the Shopify App Store and switching on its app embed in the Theme Editor. With ZeDaq.ai that takes about 10 minutes and no code. Shoppers then upload a photo on your product page and see your actual garment rendered on them.
Here's the full process, what it costs, and how to check it's working.
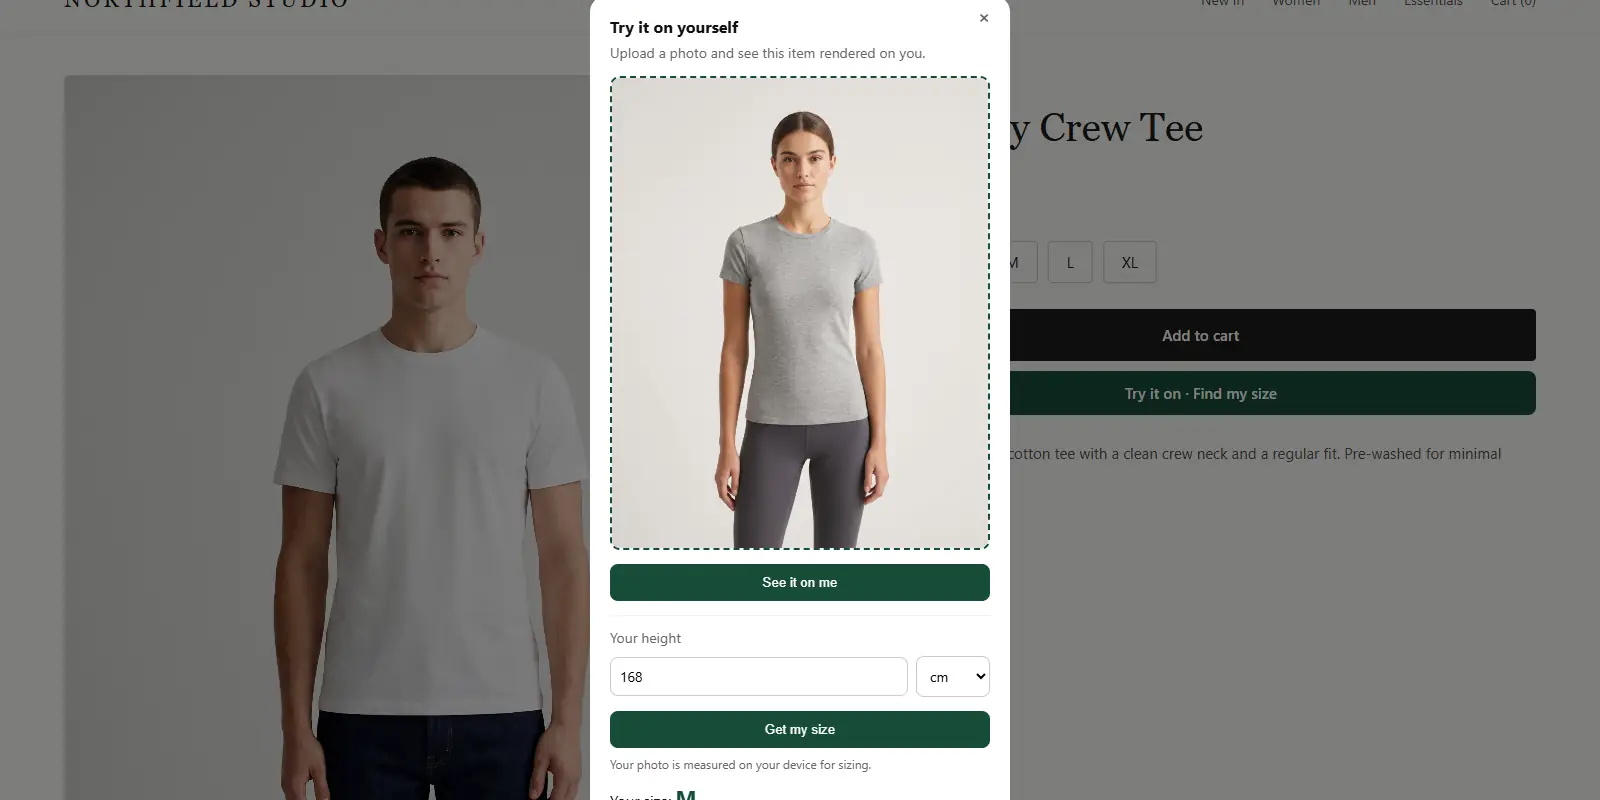
See what your shoppers will see
Try it on yourself
Live renderUpload a photo, pick a piece, see it rendered on you.
Pick something to try on
What do you need before you start?
- A Shopify store on any plan, using an Online Store 2.0 theme (Dawn and most themes released since 2021 are).
- Clear product photos: front-facing, garment fully visible, plain or simple background.
- Your size chart in centimetres or inches, if you want size recommendations.
- Staff access with permission to install apps and edit themes.
Step 1: Install ZeDaq.ai from the Shopify App Store
- Open ZeDaq.ai on the Shopify App Store.
- Click Install and pick your store.
- Approve the permissions. ZeDaq.ai reads products and collections and edits the Online Store theme so it can add the widget. It doesn't touch orders or customer payment data.
- Choose a plan. Every plan starts with a 3-day free trial.
Step 2: Switch on the app embed
- In Shopify admin, go to Online Store → Themes → Customize.
- Open App embeds in the left sidebar.
- Turn on ZeDaq.ai Virtual Try-On.
- Click Save.
The try-on button now appears on product pages. You haven't edited any theme code, so removing it later is one toggle.
Step 3: Choose placement and catalogue type
- Inline: the button sits under the Add to cart button. Best for most clothing stores.
- Floating: a button stays on screen as the shopper scrolls. Useful on long product pages.
- Catalogue type: choose clothing for photo-based try-on or eyewear for live camera try-on with face tracking.
Step 4: Add your size chart (optional, recommended)
Open ZeDaq.ai from your Shopify admin and add your size chart. When a shopper takes the 30-second body scan — one photo plus their height — ZeDaq.ai matches their measurements to your chart and suggests a size. Size lookups don't count against your try-on quota.
Step 5: Test it on your own products
- Open a live product page on your phone.
- Tap the try-on button and upload a photo.
- Check the render for fit, colour and pattern.
- Run the body scan and confirm the suggested size matches your chart.
- Repeat for one top, one dress and one item of outerwear.
If a garment renders poorly, swap the main image for a cleaner front-facing shot.
Step 6: Track the results
Your ZeDaq.ai dashboard shows try-ons and credits used in real time. In Shopify Analytics, compare conversion rate and return rate for try-on products over the 30 days before and after install. Our guide to measuring conversion gains from virtual try-on walks through a simple test.
How much does virtual try-on on Shopify cost?
ZeDaq.ai Shopify plans, billed through your Shopify invoice in USD:
| Plan | Monthly | Annual | AI try-ons/mo | Measurements | Extras |
|---|---|---|---|---|---|
| Micro | $14 | $140 | 20 | 30 | CRM, 10 invoices |
| Starter | $49 | $490 | 75 | 100 links | Orders & delivery calendar, 30 invoices |
| Growth | $129 | $1,290 | 650 | Unlimited | Higher-quality render, logo on invoices |
| Scale | $299 | $2,990 | 2,000 | Unlimited | Higher-quality render, logo on invoices |
All plans include a 3-day free trial, live eyewear try-on and the multi-language storefront widget. Prices checked 6 November 2026 on the Shopify App Store listing.
Which plan? Start on Starter if you're testing on a handful of bestsellers. Move to Growth once try-on is live across your catalogue.
What problems come up, and how do you fix them?
| Problem | Likely cause | Fix |
|---|---|---|
| Button doesn't appear | App embed is off, or theme isn't 2.0 | Turn on the embed in Theme Editor; check your theme version |
| Render looks wrong | Product photo is angled, cropped or on a busy background | Use a front-facing, full-garment image as the first product image |
| Size suggestion seems off | Size chart missing or in the wrong units | Re-enter the chart and check units |
| Try-ons paused | Monthly cap reached | Upgrade, or wait for the next billing cycle |
Frequently asked questions
Do I need a developer to add virtual try-on to Shopify?
No. ZeDaq.ai installs from the App Store and switches on in the Theme Editor. There's no code to paste.
Will it work with my theme?
It works with Online Store 2.0 themes through Shopify's app embed. Older vintage themes may not support app embeds.
Do shoppers need to download an app or create an account?
No. Shoppers upload a photo on your product page. No app, no account.
Is shopper data stored?
See our guide on shopper privacy and virtual try-on and the ZeDaq.ai privacy policy.
Can I remove it?
Yes. Turn off the app embed, or uninstall the app. Your theme code is unchanged.
Add try-on to your product pages today
Internal links: Best AI virtual try-on apps for Shopify · AI size recommendation for fashion stores · Product page checklist for fashion stores
Try ZeDaq.ai free
Virtual try-on and Find my size for your store, plus client, order and invoicing tools for tailors, in one subscription.