How to Evaluate a Size Recommendation Tool's Accuracy
By the ZeDaq.ai team · · 6 min read
On this page
To evaluate a size recommendation tool's accuracy, test it on people whose size you already know, then track what happens after real shoppers use it. In practice, that means tape-measuring a small panel of staff, running each one through the tool, and scoring its pick against the size they actually wear in your brand.
A vendor's own accuracy claim can't tell you how the tool performs with your size chart and your customers. A test you run yourself can. For the basics of how these tools work, start with the guide to AI size recommendation for fashion stores.
What does "accurate" mean for a size recommendation?
It means the tool suggests the size the shopper would keep. That is not the same as measuring the body perfectly. A tool can be a little off on chest and still pick the right label, because each size covers a range.
So test two things separately:
- Measurement accuracy: how close the tool's body numbers are to a tape measure.
- Size accuracy: whether the suggested label matches the size the person wears and likes.
Size accuracy is what your shoppers feel. Measurement accuracy helps you find out why a wrong pick happened.
Run a scan on yourself before you test
Try it on yourself
Live renderUpload a photo, pick a piece, see it rendered on you.
Pick something to try on
How do you set up an in-house test?
Step 1: Check your size chart first
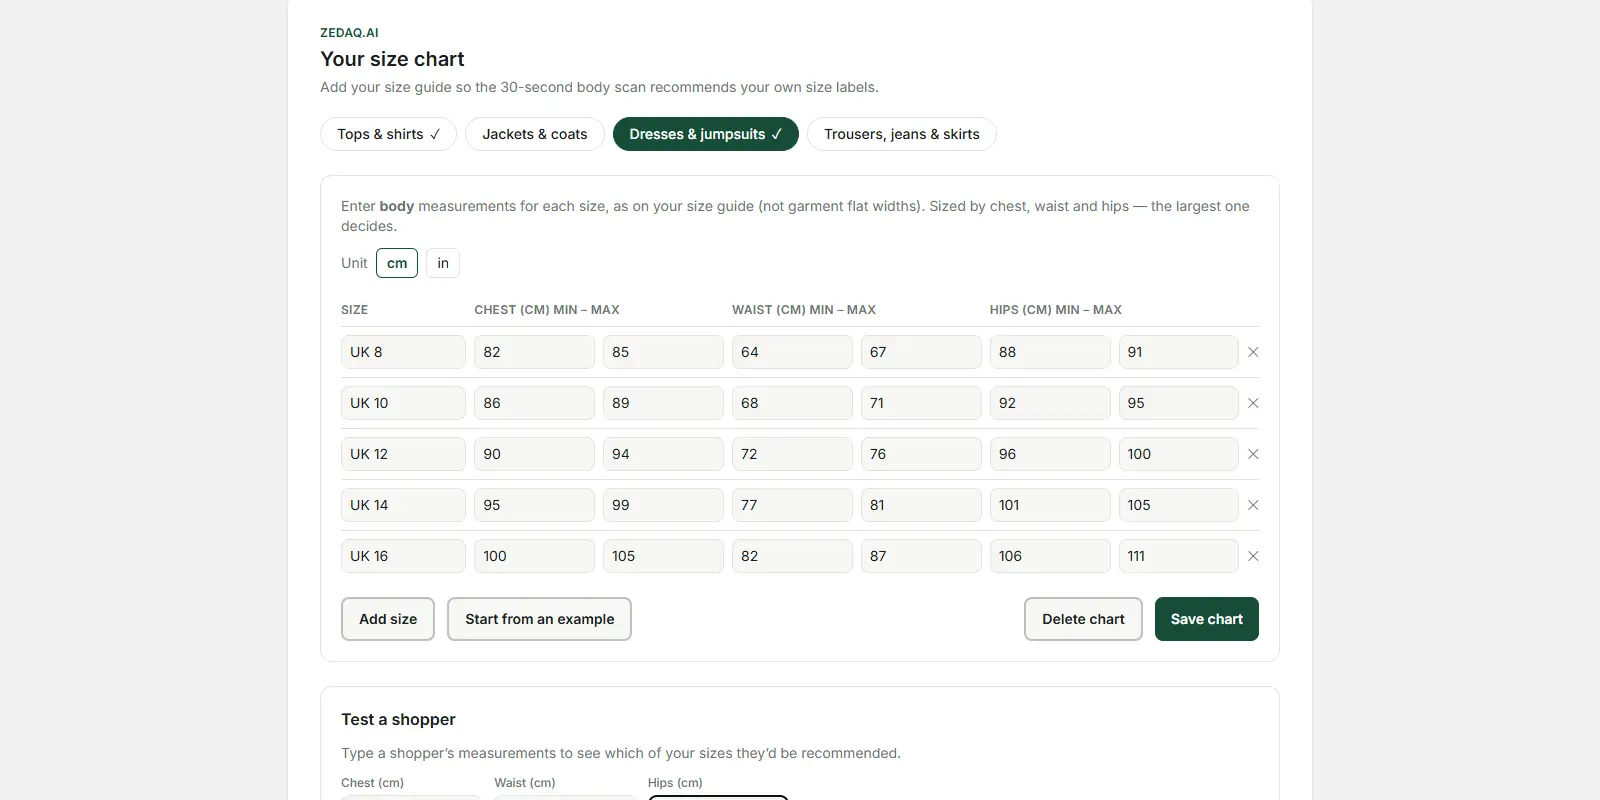
A size advisor can only be as good as the chart you give it. Before testing, look for gaps where one size ends and the next starts higher. Make the ranges meet, and make sure each garment type has its own chart.
Step 2: Build a test panel
Pick 10 to 20 people: staff, friends or regular customers who agree to help. Aim for a spread of heights and body shapes across your whole size range. Include people at the smallest and largest sizes you sell, since edges are where tools often struggle.
Step 3: Tape-measure everyone the same way
Measure each person in light, close-fitting clothes. Use the same person with the same tape for everyone, so your own method stays consistent.
- Chest: around the fullest part, tape level under the arms.
- Waist: around the natural waist, the narrowest point above the navel.
- Hips: around the fullest part of the seat, feet together.
- Height: standing against a wall, without shoes.
Measure each point twice. If the two readings differ a lot, measure a third time and use the closest pair.
Step 4: Record the size each person really wears
Have each person try your actual garments and pick the size they would keep. Write this down before they use the tool, so the tool's answer doesn't sway their choice. This "true size" is what you score against.
Step 5: Run each person through the tool
Follow the tool's instructions exactly, as a shopper would. Do it on a phone, in normal home lighting, not in a studio. Record the measurements and the size it suggests.
How do you score the results?
Use a simple sheet with one row per person and garment. Here is an example layout with sample entries:
| Tester | Garment | Tape chest (cm) | Tool chest (cm) | Size worn | Size suggested | Result |
|---|---|---|---|---|---|---|
| A | Shirt | 98 | 100 | M | M | Match |
| B | Shirt | 104 | 101 | L | M | One size small |
| C | Dress | 92 | 93 | 12 | 12 | Match |
| D | Trousers | — | — | 32 | 34 | One size large |
Example scoring sheet with made-up testers. Use your own panel and your own chart.
Then sort the results into three groups:
- Match: the suggested size is the one they wear.
- One size off: close, and often fine for loose styles.
- Two or more sizes off: a real problem worth investigating.
Look for patterns, not just totals. If the tool always suggests small on one garment type, the chart for that type may be wrong. If misses cluster at the largest sizes, check that your chart covers your full range.
How do you test across different products and shoppers?
Fit expectations change by category, so test each one you sell. Compression and stretch pieces need a tighter match than relaxed knitwear. The guide to size recommendation for activewear brands covers how stretch changes what counts as the right size.
Tailored menswear is stricter still, as chest and shoulder matter more than in casual tops. If you sell shirts and suits, test those separately, as the guide to menswear size recommendation explains.
Also test the hard cases on purpose:
- Between sizes: someone whose chest is right at the edge of two sizes. Does the tool explain its choice?
- Different body shapes: a tester whose hips are one size and chest another. Which measurement wins?
- Poor photos: for photo-based tools, try baggy clothes, low light and a cluttered room. Does the tool ask for a better photo, or guess?
Loose and long garments raise their own questions, because length and drape matter as much as body width. The guide to sizing for modest fashion stores covers that case.
How do you measure accuracy after launch?
A panel test tells you whether the tool works before launch. Real orders tell you whether it works for your customers. Track these each month:
- Size exchanges: how many orders come back for a different size of the same item.
- Return reasons: tag each return as "too small", "too large" or "other". Keep the tags simple so staff use them.
- Tool users vs non-users: if your tool or analytics can tag orders where the shopper used the advisor, compare size exchanges between the two groups.
- Repeat problems: note products that come back for size again and again. These usually point to a chart or product issue, not the tool.
Give it time before you judge. A few weeks of orders can swing a lot by chance, especially in a small store. Compare similar periods, such as one month against the same month the year before, so seasonal sales don't skew the picture.
What questions should you ask a vendor?
Before you test, ask each vendor how the tool reaches its answer:
- Does it use your size chart, or a generic one?
- Can you have separate charts for tops, dresses and bottoms?
- What happens when a shopper falls between sizes?
- Does it let you test with sample measurements before going live?
- Is there a free plan or trial long enough for your panel test?
ZeDaq.ai matches measurements from a 30-second body scan to your own chart, one chart per garment type. When measurements point to different sizes, it sizes up to the largest relevant one. The Free plan includes 3 measurements a month, and every paid plan has a 3-day free trial with no card required, starting with Micro at $14 a month.
Run your own accuracy test
FAQs
How many testers do I need?
Ten is enough to spot clear problems. Twenty gives you a better spread across sizes and body shapes. More testers matter less than covering your full size range.
Should I trust a vendor's published accuracy figure?
Treat it as a starting point. Ask how it was measured and on which size charts, then run your own test with your chart and your garments.
Is "one size off" a failure?
Not always. For loose or oversized styles, one size either way can still be a keeper. For fitted or stretch garments, count it as a miss.
Can I test without real people?
Some tools let you type sample measurements to see which size they return. That checks your chart, but it doesn't test how well the tool measures a body.
Try ZeDaq.ai free
Virtual try-on and Find my size for your store, plus client, order and invoicing tools for tailors, in one subscription.